Last Updated: Sep 27, 2018
This article includes directions for Groupon Store owners who have not had their Groupon Store upgraded yet by Groupon. Groupon store migration to their new platform is happening from 3rd QRT 2018 through 1st or 2nd QRT 2019. Groupon will notify you when your store is being migrated.
If your Groupon Store has been upgraded to the new Groupon Goods Marketplace, please review the current Groupon Store Order Management set-up article.
Old Groupon Store Set-up
Follow the steps below to manage your Groupon Store orders:
- These instructions are for Groupon Store owners who have not been migrated to the new Groupon Goods Marketplace.
- Upload your Orders into the OMS
- Log into your Groupon Store admin area to request your order files to upload into the OMS:
- From the Orders page, click the download Order CSV button
- Email: enter the email address you want the files emailed to
What do you want to download?:You will need to request 2 files be emailed to you for upload into your OMS. 1) Request Orders that need to be shipped and 2) Orders for Analysis.
Date Range: Be sure to select the same date range for both files. The OMS checks for duplicate Groupon Order numbers, so it will not duplicate any Groupon orders if you download the same set of orders multiple times.

- In your OMS, go to the Sell On > Groupon page and upload the two files together using the Groupon Order Upload tool:
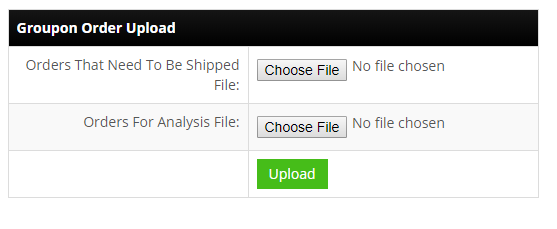
Once you have uploaded your Groupon order files, your new orders will appear on the Order listing page of your OMS. You can then fulfill your orders with your desired shipping carrier and then use the Groupon Tracking File export tool to create the tracking upload file.
Follow the instructions below to import Groupon Products into the OMS, upload tracking numbers to Groupon, and Update Inventory and Pricing in your Groupon Store.
- Log into your Groupon Store admin area to request your order files to upload into the OMS:
Groupon Product Import
Important: You must download your active Groupon products from the Groupon admin area and upload them into your OMS. This is required so the OMS has the required information to build the Groupon Inventory file. You should do this when you first set-up your OMS/Groupon connection and any time you have new produts approved for sale on Gropon.
- Download Your Groupon Products:
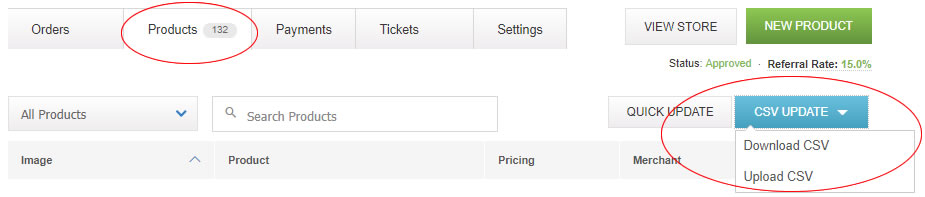
From your Groupon Admin area, click on the Products tab and then click on the CSV Update button and select the Download CSV option. This will ask you to enter an email address to have the file emailed to you.
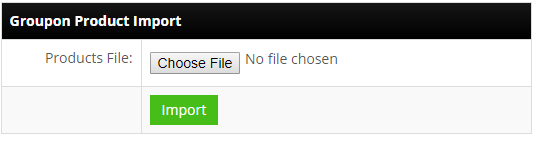
- Save the file from the email you receive and then upload that file into the Groupon Product Import tool on the Sell On > Groupon page.
Groupon Tracking File
The Groupon Tracking File tool allows you to download the .csv file required to upload your tracking numbers to your Groupon Store.
- From the Sell On > Groupon page in the OMS, create your Groupon Order Tracking file using the Groupon Tracking File tool.
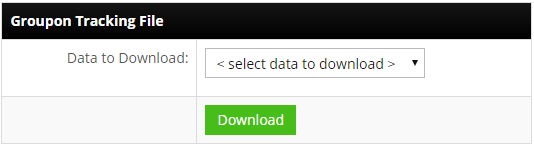
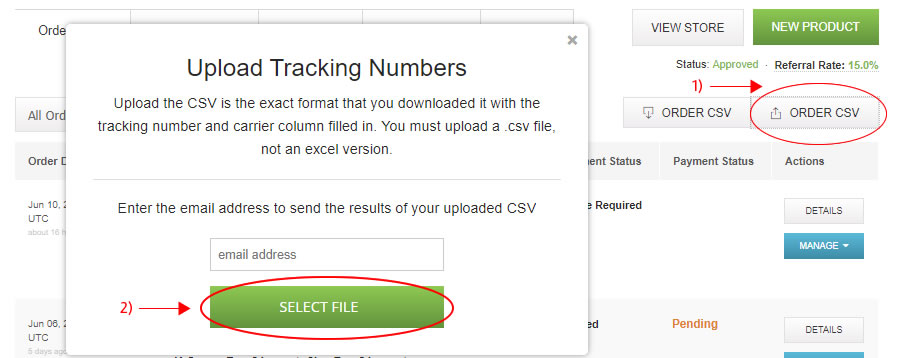
- Upload your Groupon Tracking File to your Groupon Store admin area using the Upload Orders CSV tool in the Groupon Stores admin area. This will save your tracking numbers to the assocated Groupon order numbers.
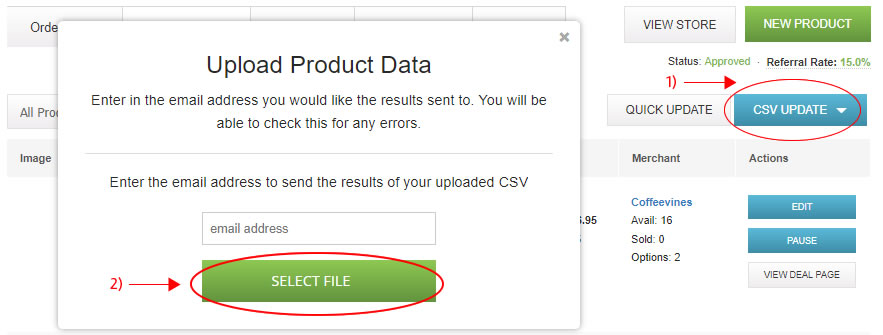
1) Click on the Upload Order CSV button
2) Enter your email address and Select the File by clicking the Green Select File button
After uploading the file you will receive an email confirming receipt of your tracking.
Groupon Inventory Updates
The Groupon Inventory File requires that you have all of your current active Groupon products downloaded via the Groupon Product Import. SKUs that have not been downloaded into the OMS via that tool will not appear on the Groupon Inventory file. The Inventory File will generate the required .csv file for you to upload to your Groupon Stores admin area. It will pull the current inventory in the OMS at the time of the file request.
- Download the current inventory file using the Groupon Inventory File tool on the Sell On > Groupon page.
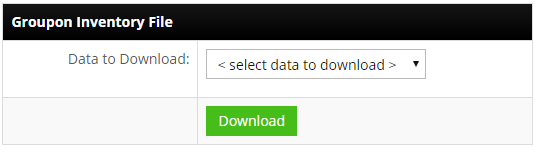
- Upload the Inventory .csv file into your Groupon Stores admin area using the CSV UPDATE button and select the Upload option.
1) Click on the CSV UPDATE button and select Upload CSV
2) Enter your email address and Select the File by clicking the Green Select File button
After uploading the file you will receive an email confirming receipt of your inventory update.