
What people consistently say they love about QuickBooks Online is that it's simple enough to manage without an accounting background. Adding a multichannel operation on top of it puts that simplicity at risk, hundreds of individual order transactions can turn clean books into a mess fast if the setup is wrong from day one. This walks through the actual InfiPlex-to-QBO setup, step by step, including the decisions that determine whether your books stay organized once real order volume hits.
Jump to What You Need
| If You Want To… | Jump To |
|---|---|
| Connect InfiPlex to QuickBooks Online | Step 1: Connect the Two Accounts |
| Turn on the one QBO setting InfiPlex needs | Step 2: Enable Shipping in QBO |
| Decide how orders should post to your books | Step 3: Sales Receipt vs Invoice, the Real Decision |
| Map your accounts correctly | Step 4: Map Your Accounts |
| Sell from more than one warehouse | Step 5: Turn On Multi-Warehouse, If You Need It |
| Get sales tax onto your receipts correctly | Step 6: Set Up Tax Codes |
Step 1: Connect the Two Accounts
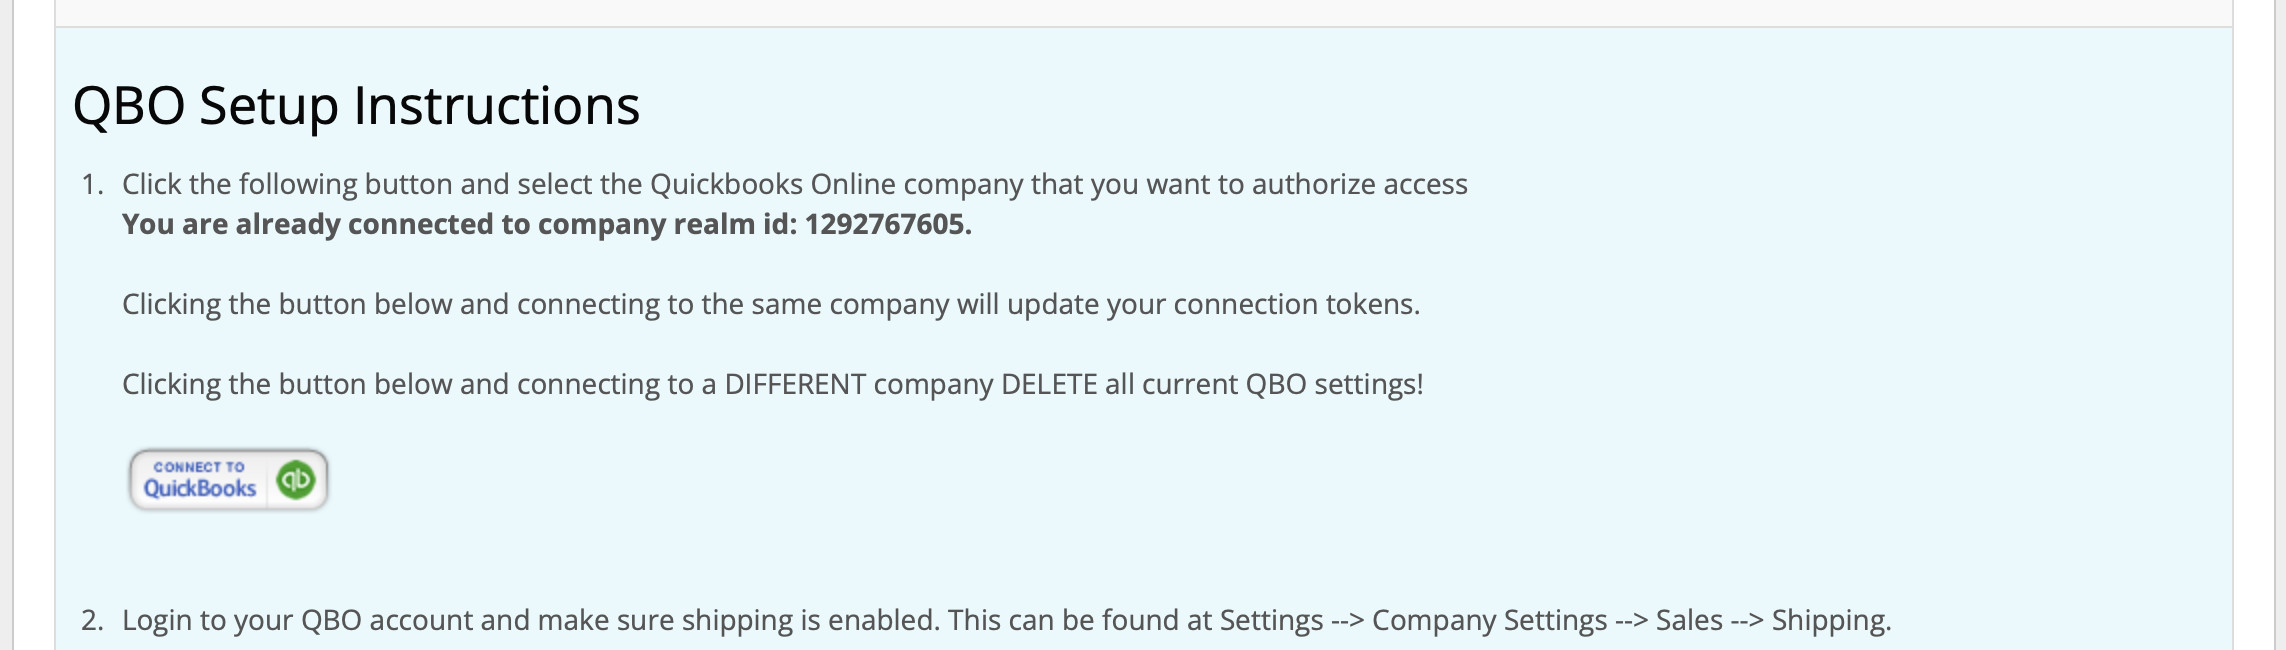
From the QBO tab in InfiPlex, click Connect to QuickBooks and sign in to authorize access. InfiPlex will show which QuickBooks company (its "realm ID") is currently connected.
One real warning worth knowing before you click anything: reconnecting to the same company just refreshes your connection tokens, safe to do any time. Reconnecting to a different QuickBooks company deletes all of your current QBO settings. If you're troubleshooting a connection issue, confirm you're re-authorizing the same company before you click through.
Step 2: Enable Shipping in QBO's Own Settings
Before anything else, log into QuickBooks Online directly and turn on shipping: Settings → Company Settings → Sales → Shipping. This is a QuickBooks setting, not an InfiPlex one, and it has to be on for shipping charges to post correctly once orders start flowing in. It's an easy step to miss since it happens outside InfiPlex entirely.
Once connected, let InfiPlex pull your existing QBO data (accounts, items, tax codes) before touching any settings below. The dropdowns in the next two steps populate from that initial pull.
Step 3: Sales Receipt vs Invoice, the Decision That Actually Matters
This is the single setting most likely to determine whether your books stay clean or get messy, and it's a real choice, not a default to click past. InfiPlex can push each order into QBO three ways, set on the Settings page:

| Option | What it means | Fits best when |
|---|---|---|
| Sales Receipt | Records the sale as already paid in full, no open balance created. | Marketplace and storefront orders, where payment already happened before InfiPlex ever sees the order. |
| Invoice - Automatic | Creates an invoice and marks it paid automatically. | Businesses that want an invoice record for every sale but don't need manual review. |
| Invoice - Manual | Creates an invoice that stays open until someone marks it paid. | Wholesale or net-terms accounts where payment genuinely happens later, and someone should confirm it. |
The mistake that actually causes messy books: using an Invoice setting for orders that are already paid through a marketplace. Every one of those orders sits in QBO as an open receivable that never resolves on its own, since the money was never going to come in through QuickBooks in the first place. If every order you sync is already paid before InfiPlex sees it, Sales Receipt is almost always the setting that matches reality.
Step 4: Map Your Accounts
On the Settings page, map each of the following once, and every future sync uses the same mapping automatically:
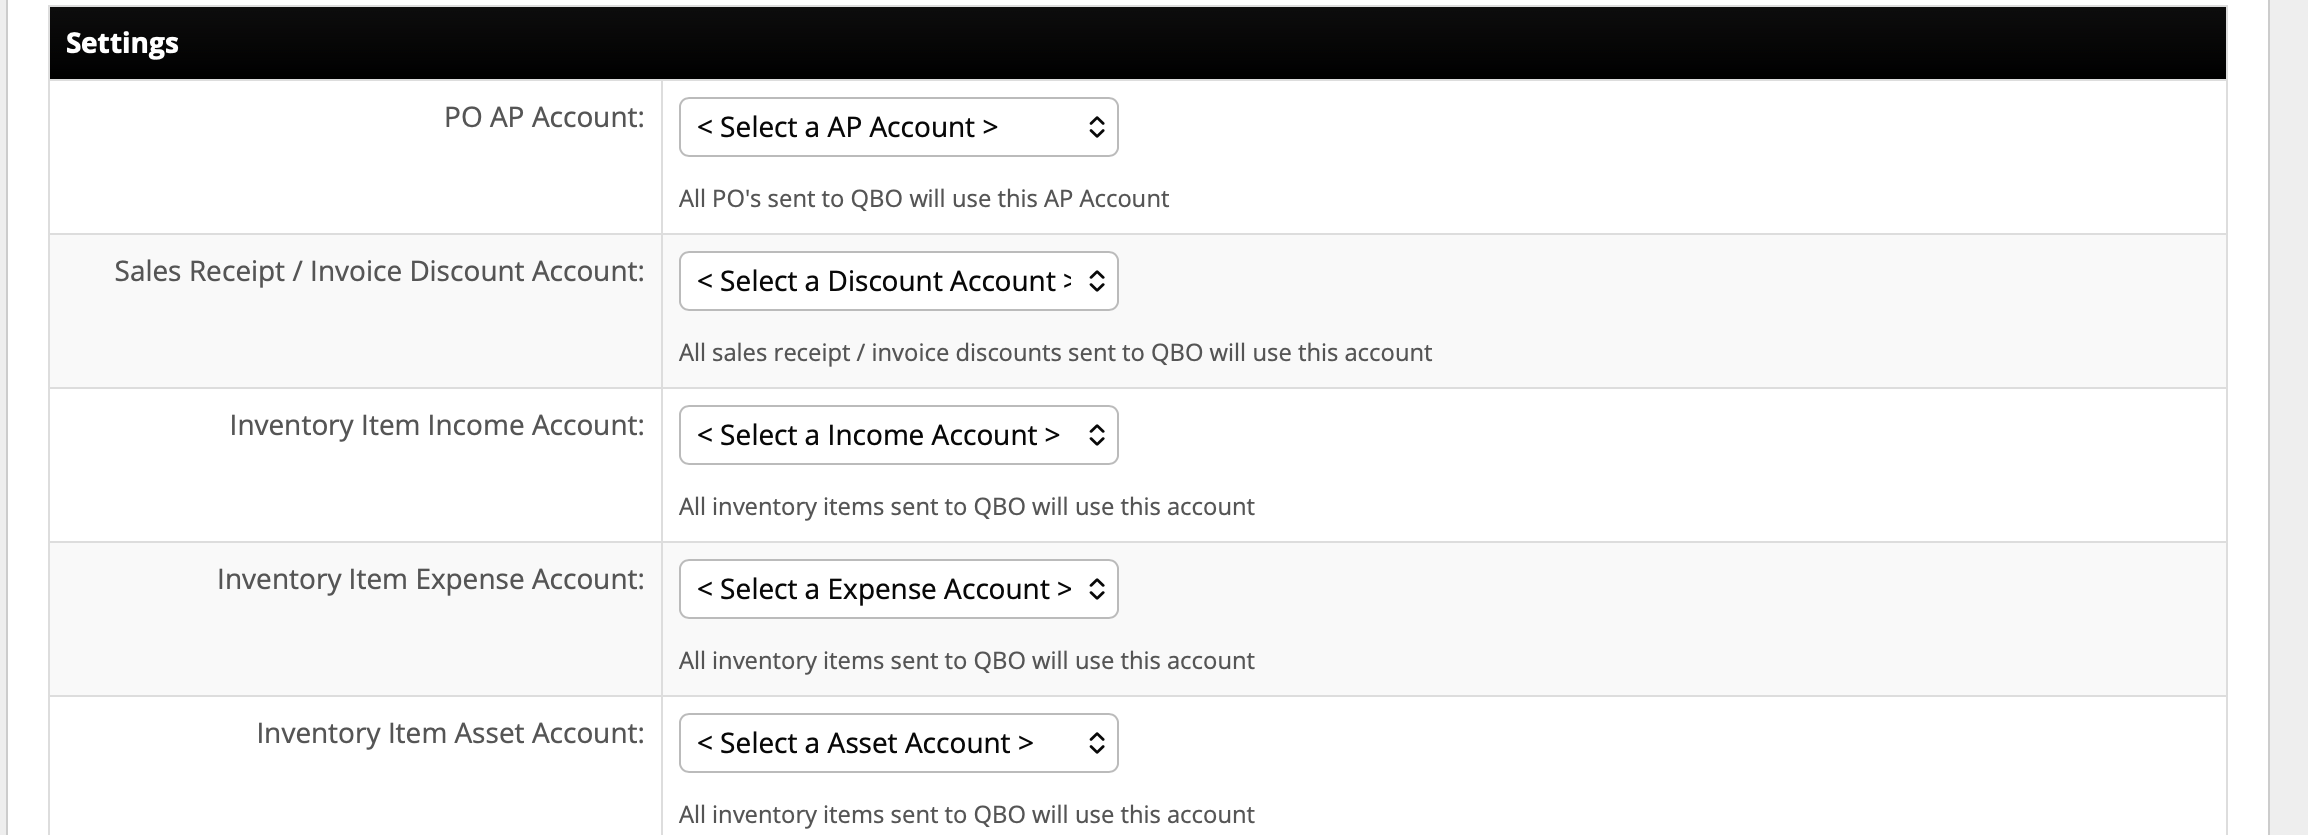
- PO AP Account: the accounts payable account every purchase order InfiPlex sends to QBO will use.
- Sales Receipt / Invoice Discount Account: where discounts on synced orders post.
- Inventory Item Income, Expense, and Asset Accounts: the three accounts every inventory item synced to QBO will use.
Step 5: Turn On Multi-Warehouse, If You Need It
QuickBooks Online doesn't natively support multiple warehouse locations, so if you fulfill from more than one location, InfiPlex has to work around that at the product level. QBO requires every SKU to be unique, so with Multi-Warehouse enabled, InfiPlex names each product in QBO based on its SKU combined with its InfiPlex warehouse, rather than the SKU alone.

For this to work correctly, edit each of your existing warehouses in InfiPlex and assign it its own QBO Asset Account. Every warehouse needs a distinct asset account; without one, InfiPlex has no way to keep that warehouse's inventory value separate from the others in QBO's books.
Step 6: Set Up Tax Codes
On the Tax Codes page, each tax code InfiPlex pulled from QBO needs a zip code or two-character state code associated with it, so InfiPlex knows which code to apply to which order. This step is not optional: without it, tax information won't be sent on sales receipts at all.
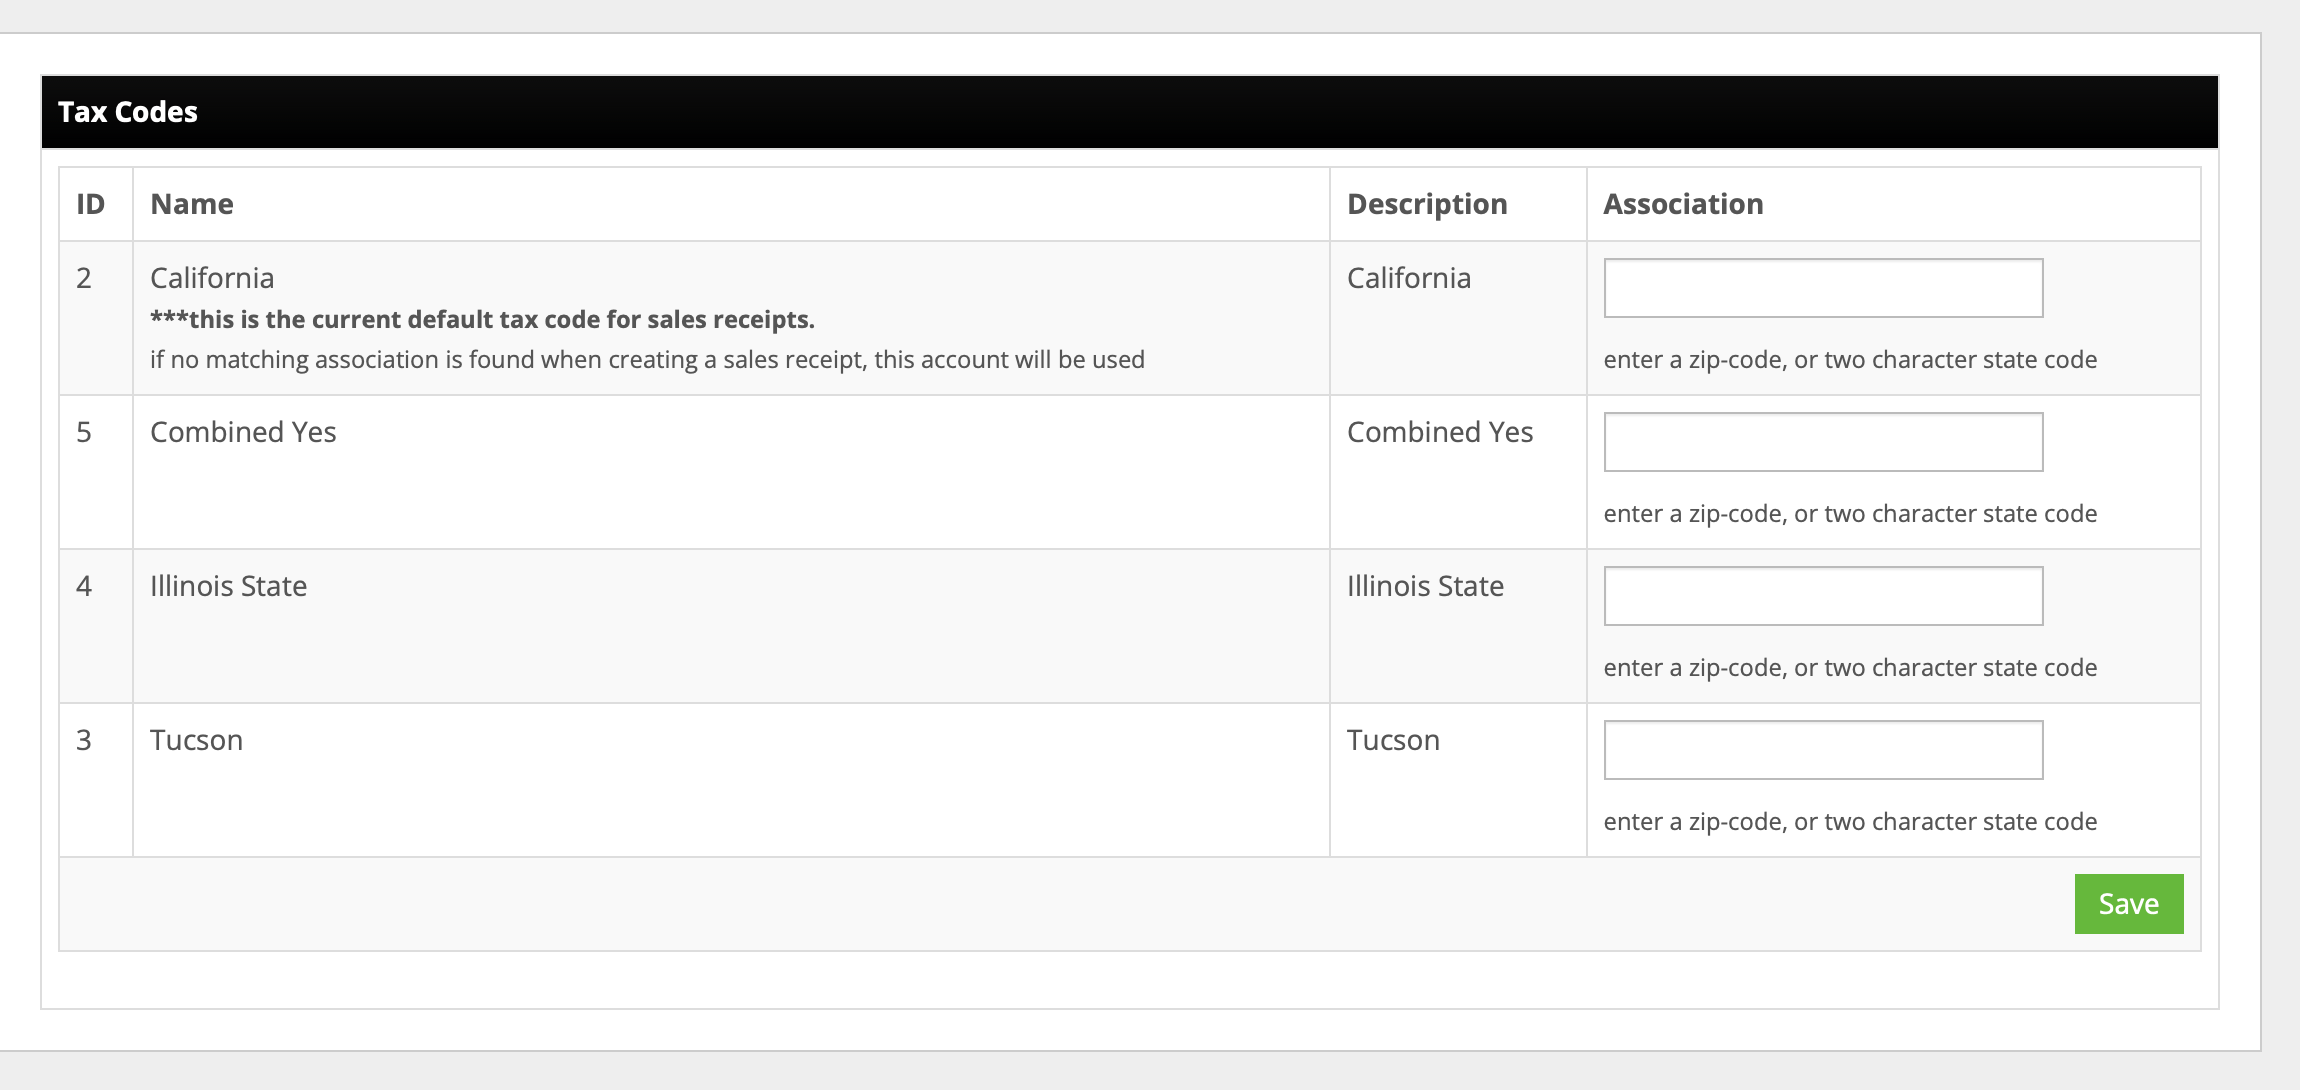
One tax code can be marked as the default, used automatically any time an order's location doesn't match any of the associations you've set. Set this to whichever code makes sense as a safe fallback for your business, not necessarily the first one in the list.
QuickBooks Online Setup Questions
Should I use Sales Receipt or Invoice for marketplace orders?
Sales Receipt fits almost every marketplace and storefront order, since payment already happened before InfiPlex sees it. Using an Invoice setting for already-paid orders creates open receivables that never resolve, since the payment was never going to arrive through QuickBooks.
What happens if I reconnect InfiPlex to a different QuickBooks company?
All current QBO settings get deleted. Reconnecting to the same company you're already connected to only refreshes your tokens and is safe to do at any time.
Does QuickBooks Online support multiple warehouse locations?
Not natively. InfiPlex works around this by naming each product in QBO using its SKU combined with its warehouse, since QBO requires unique SKUs, and by requiring a separate QBO Asset Account assigned to each warehouse.
Why isn't sales tax showing up on my synced sales receipts?
Each tax code needs a zip code or state association set on the Tax Codes page before tax information will be sent. This has to be done after your QBO data has been pulled into InfiPlex, not before.
Do I need to enable anything inside QuickBooks itself before connecting?
Yes. Turn on Shipping under Settings → Company Settings → Sales → Shipping inside QuickBooks Online before connecting, so shipping charges post correctly once orders start syncing.
In what order should I complete this setup?
Connect the accounts first, enable Shipping inside QBO, let InfiPlex pull your existing data, then configure Settings, Push Shop Orders As, Multi-Warehouse, and Tax Codes in that order, since the dropdowns on those pages populate from the initial data pull.
Need Something This Doesn't Cover?
Contact Us and we'll take a look. Support is included with every InfiPlex plan.
See the full QuickBooks Online integration
Orders, payments, and inventory sync automatically once QuickBooks Online is connected, no manual entry required.