
Last Updated: Sep 21, 2026
 The Product Upload tool in InfiPlex Inventory & Order Management System (OMS) loads SKUs from a .csv: title, price, initial inventory, weights, dimensions, and identifiers such as UPC, GTIN, and ASIN. It is the starting point for a new account and the fastest way to add new products later.
Where It Is
Tools > Product Upload in the blue menu bar.
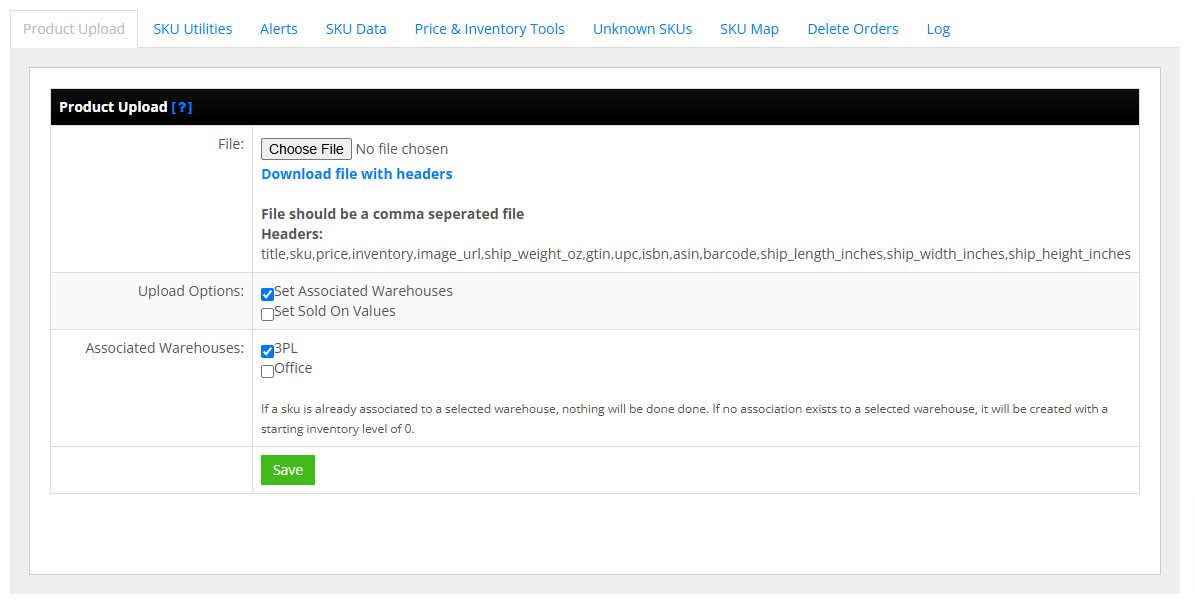
The File
Download the example .csv from the page. Column headers are lower case: title, sku, price, inventory, image_url (a URL, display only), ship_weight_oz, gtin, upc, isbn, asin, barcode, ship_length_inches, ship_width_inches, ship_height_inches.
New SKUs vs Existing SKUs
For a SKU that already exists, the upload updates title, weight, dimensions, and the identifier fields only. It does not change price, inventory, or image. Because a blank field clears that field, always include the full data for existing SKUs in the file. Price and inventory changes go through Tools > Price & Inventory Tools; see Managing Inventory.
Upload Options
- Set Associated Warehouses: check the warehouses the new SKUs belong to. The file's inventory value is applied to every checked warehouse, so check one warehouse when levels differ by location. To set a SKU up at several warehouses with different quantities, upload with inventory 0 and every warehouse checked, then set the real levels with the Price & Inventory file.
- Set Sold On Values: flag the sales channels the SKUs are listed on so inventory pushes to them. The channel integration must already be configured.
Choose the file, set the options, and click Save.
After the Upload
SKUs uploaded without Sold On values are not attached to any channel. Attach them from Sell On > [marketplace] > Set SKU Sold On; see Set SKUs as Sold On a Marketplace. Keep a per-marketplace SKU list so those flags are easy to maintain.
Set-up Support
Contact InfiPlex with any product upload questions. Support is included with every InfiPlex package.